Braided Friendship Bracelets with Vintage Fabric
SHARE THIS POST OR PIN IT FOR LATER!
*This post may contain affiliate links. Thank you for supporting my small business…at no extra cost to yourself!
For whatever reason, I don't have a lot of memories of my childhood. I can vividly remember, though, sitting outside a back door of my elementary school with a few of my friends, making and selling friendship bracelets. You know the ones knotted and tied with a rainbow's variety of embroidery floss? I loved creating those bracelets from beginning to end, including picking out the perfect colors of thread from the sewing store in town, to deciding which style I was going to make. I've made them a few times in life, actually, and each time I'm reminded how much joy they can bring.
A few years ago, I came across a maker on Instagram who was making bracelets with a similar concept. She used limited runs of vintage fabric and braided them. I took a peek recently, because I was wanting to grab a couple more new styles, but found out that she's no longer making them. Times change, I suppose, but I still really wanted those bracelets.
Love easy DIY projects? You might like my NO SEW TOTE BAGS!
I remembered back to my elementary school days of creating friendship bracelets and decided to try making my own...
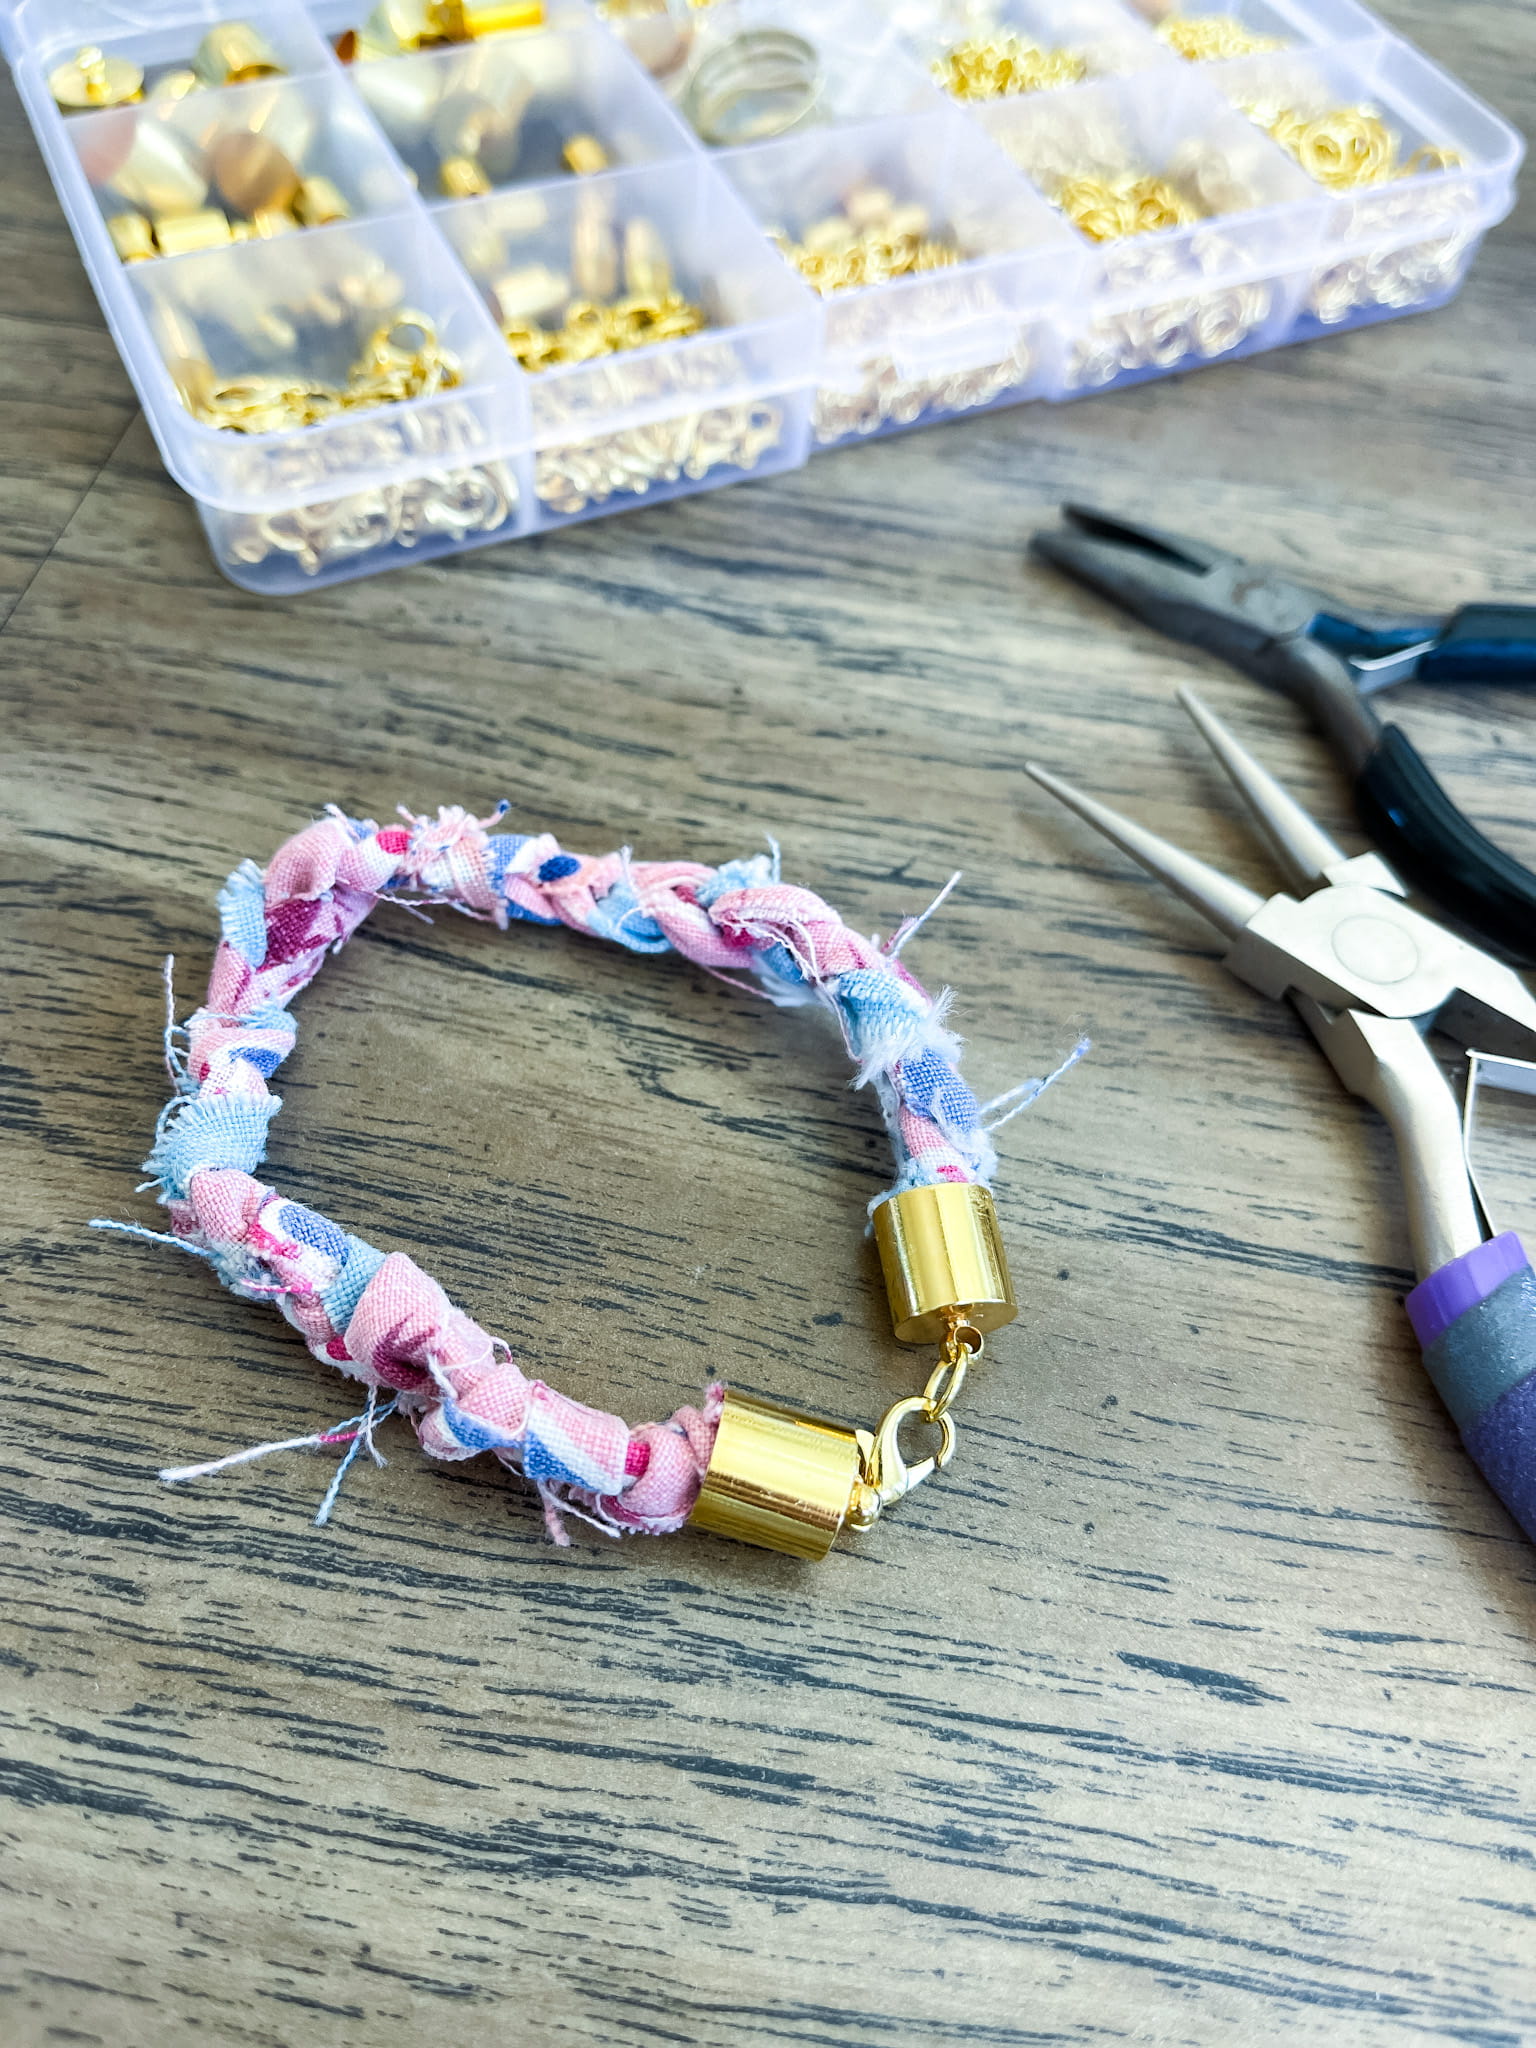
The first iteration I made using thin vintage scarves I had grabbed at an estate sale. They're always plentiful and don't cost very much money. The other part that makes the scarves perfect is that they're often torn or have stains and they're very thin for a more delicate bracelet. I didn't have any JEWELRY CLOSURES AND JUMP RINGS, so I just tied off the bracelets...truly like an old-school friendship bracelet.

I decided I wanted to be able to take the bracelets off a bit easier, though, so I did go ahead and order the JEWELRY PIECES I needed for the ends. I'm still not sure if this is the look I want for the final look of pieces I make going forward, but they work for now. Let me know if you have something that would work better...I always like learning and growing!
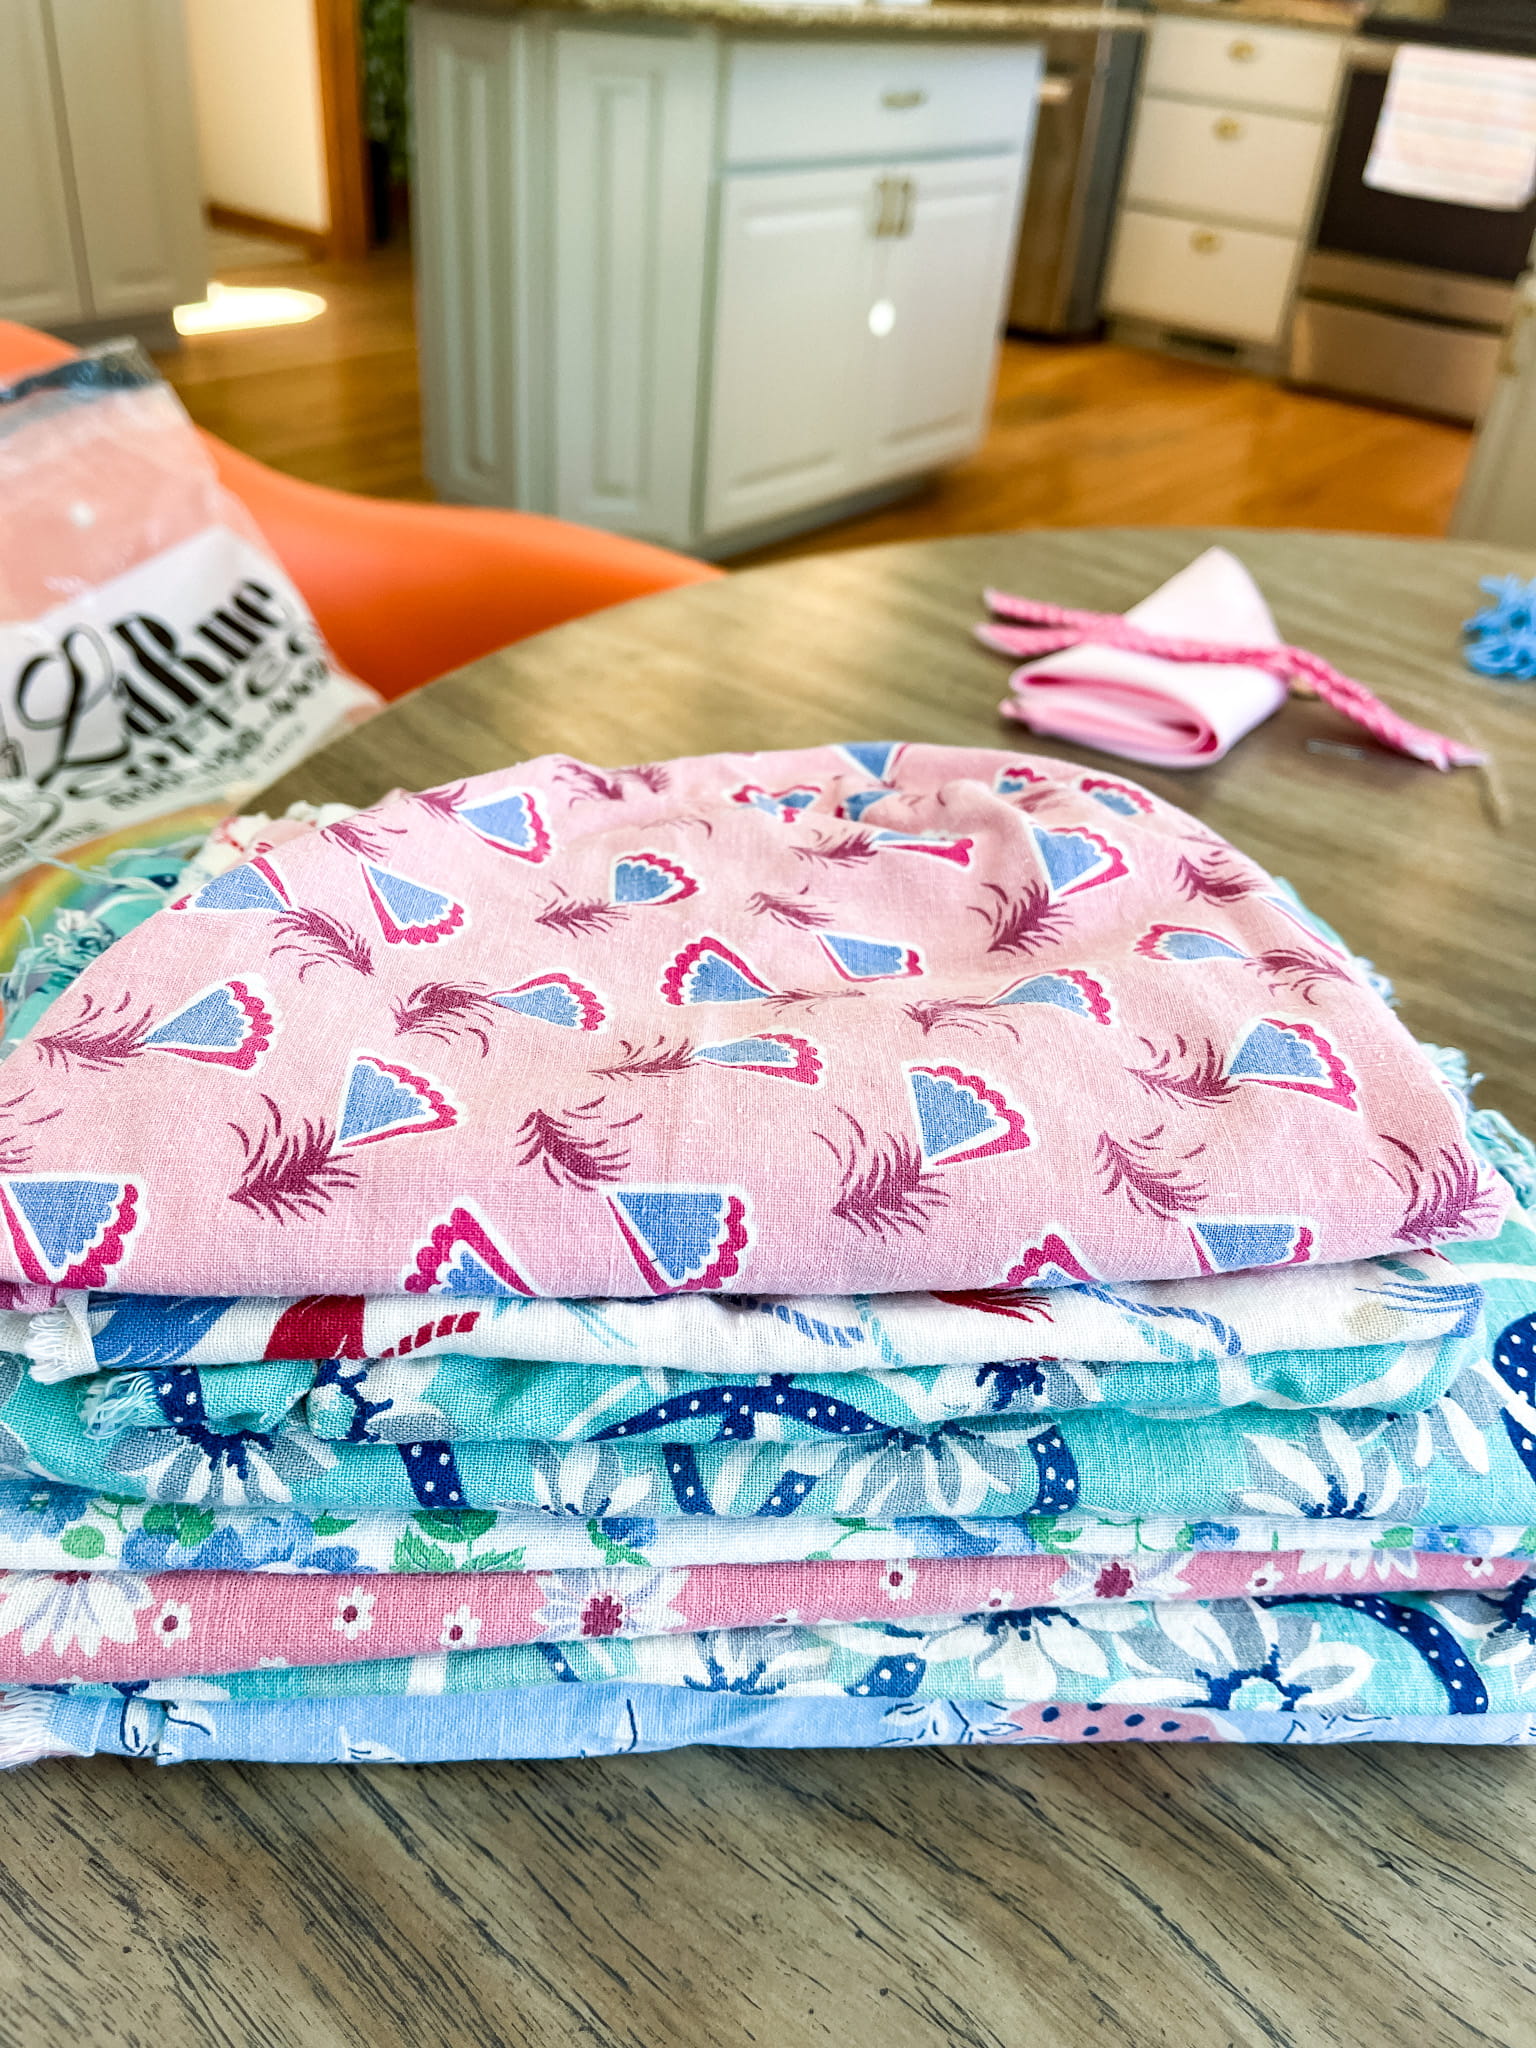
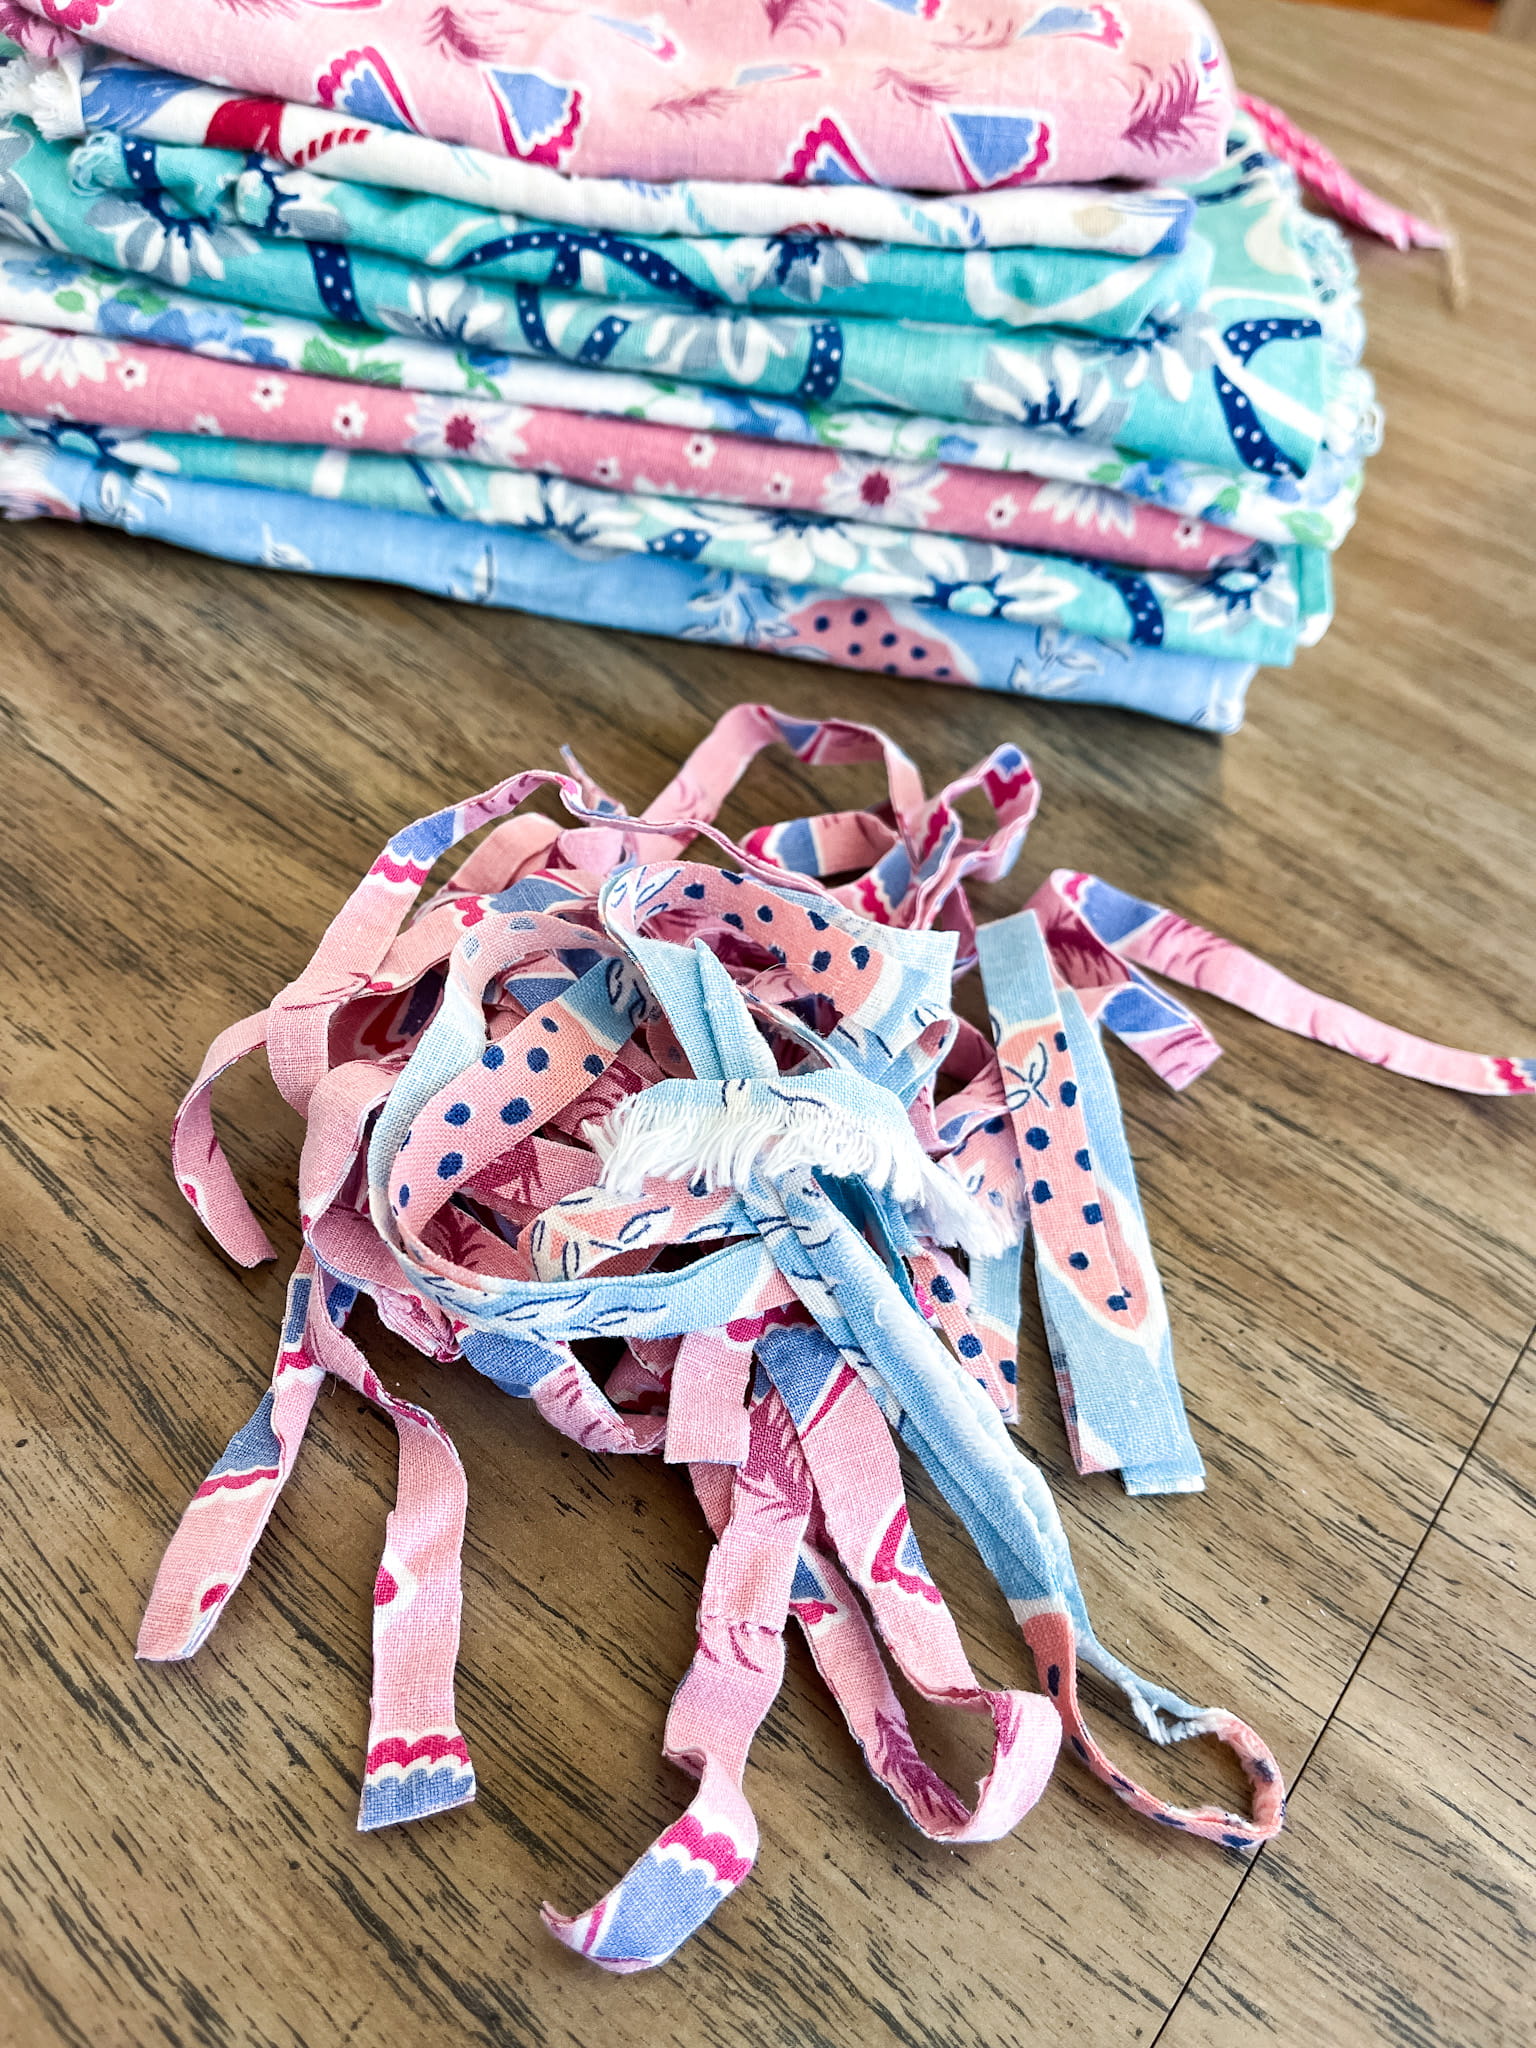
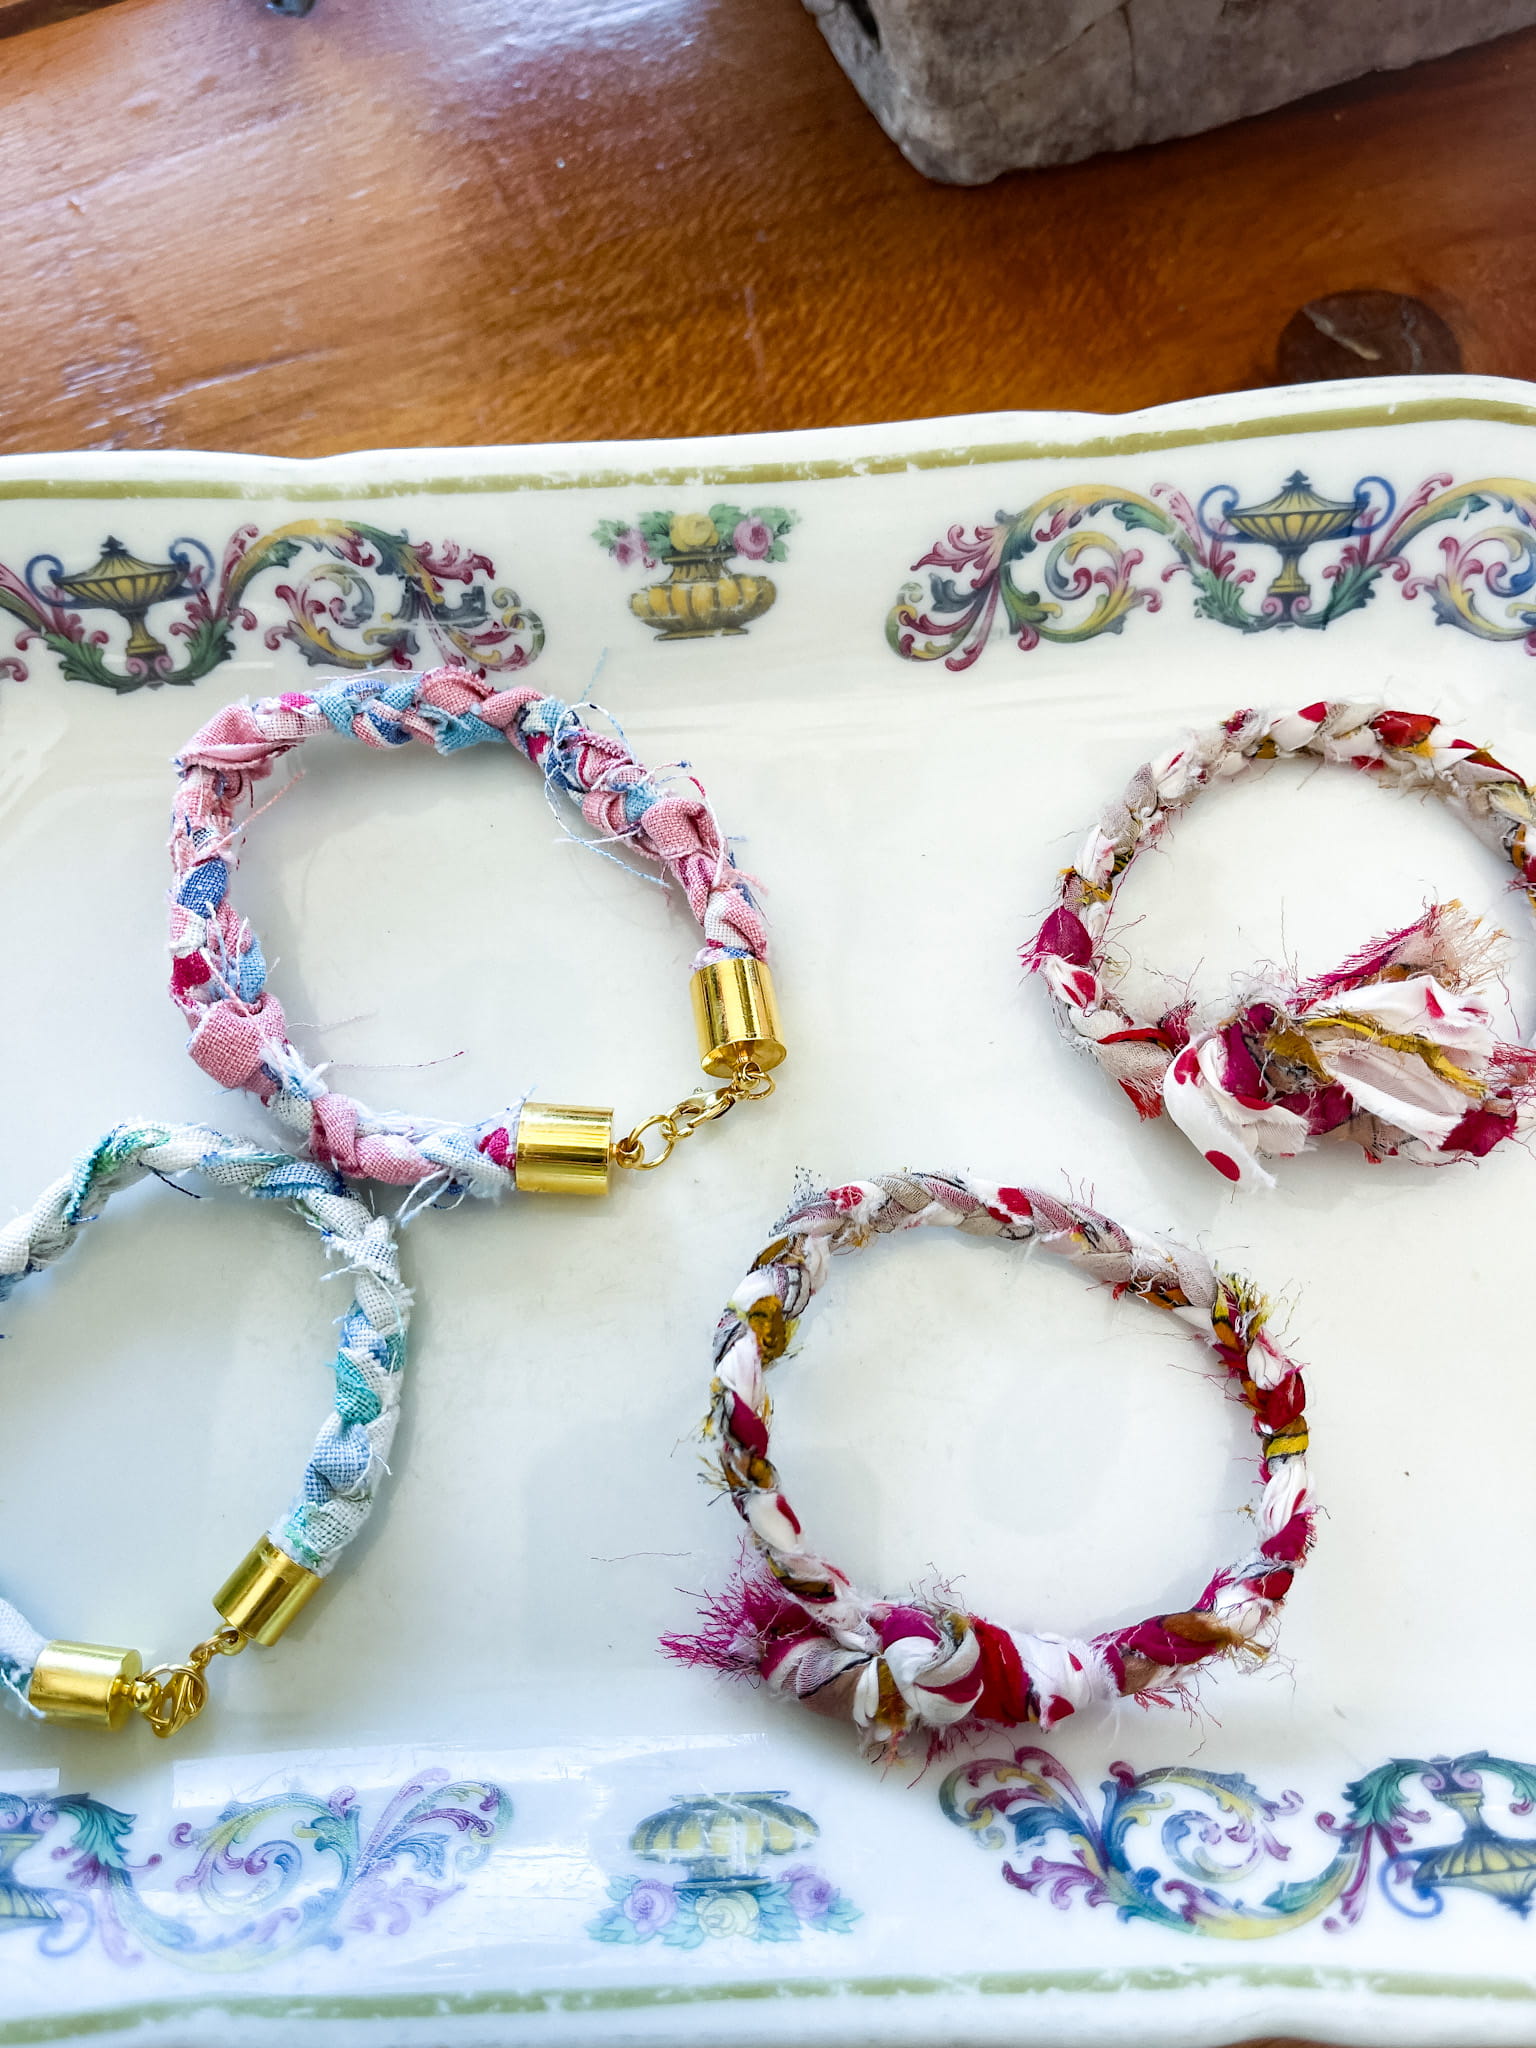
My second round of braided bracelets also came with a change in fabric. I don't have anymore scarves I want to cut up (a sign I need to hit up some ESTATE SALES), so I grabbed a stack of vintage flour sack towel fabric I've been hoarding and decided to craft from that! I like the way these turned out a little chunkier than the bracelets made with scarves. Honestly, the possibilities are endless with these bracelets and you could even get a little more creative and add charms to them as well...weaving them into the braids.
I'm definitely not an expert in this craft and I won't pretend that I am. For all I know, I chose all the wrong sizes of closures, but I still like how they turned out and will continue to hone my skills.
That being said, a rough outline of making the bracelets:
- Cut 3 equal-length strips of fabric. Mine were between 1/4"-1/2" wide and maybe 16" long.
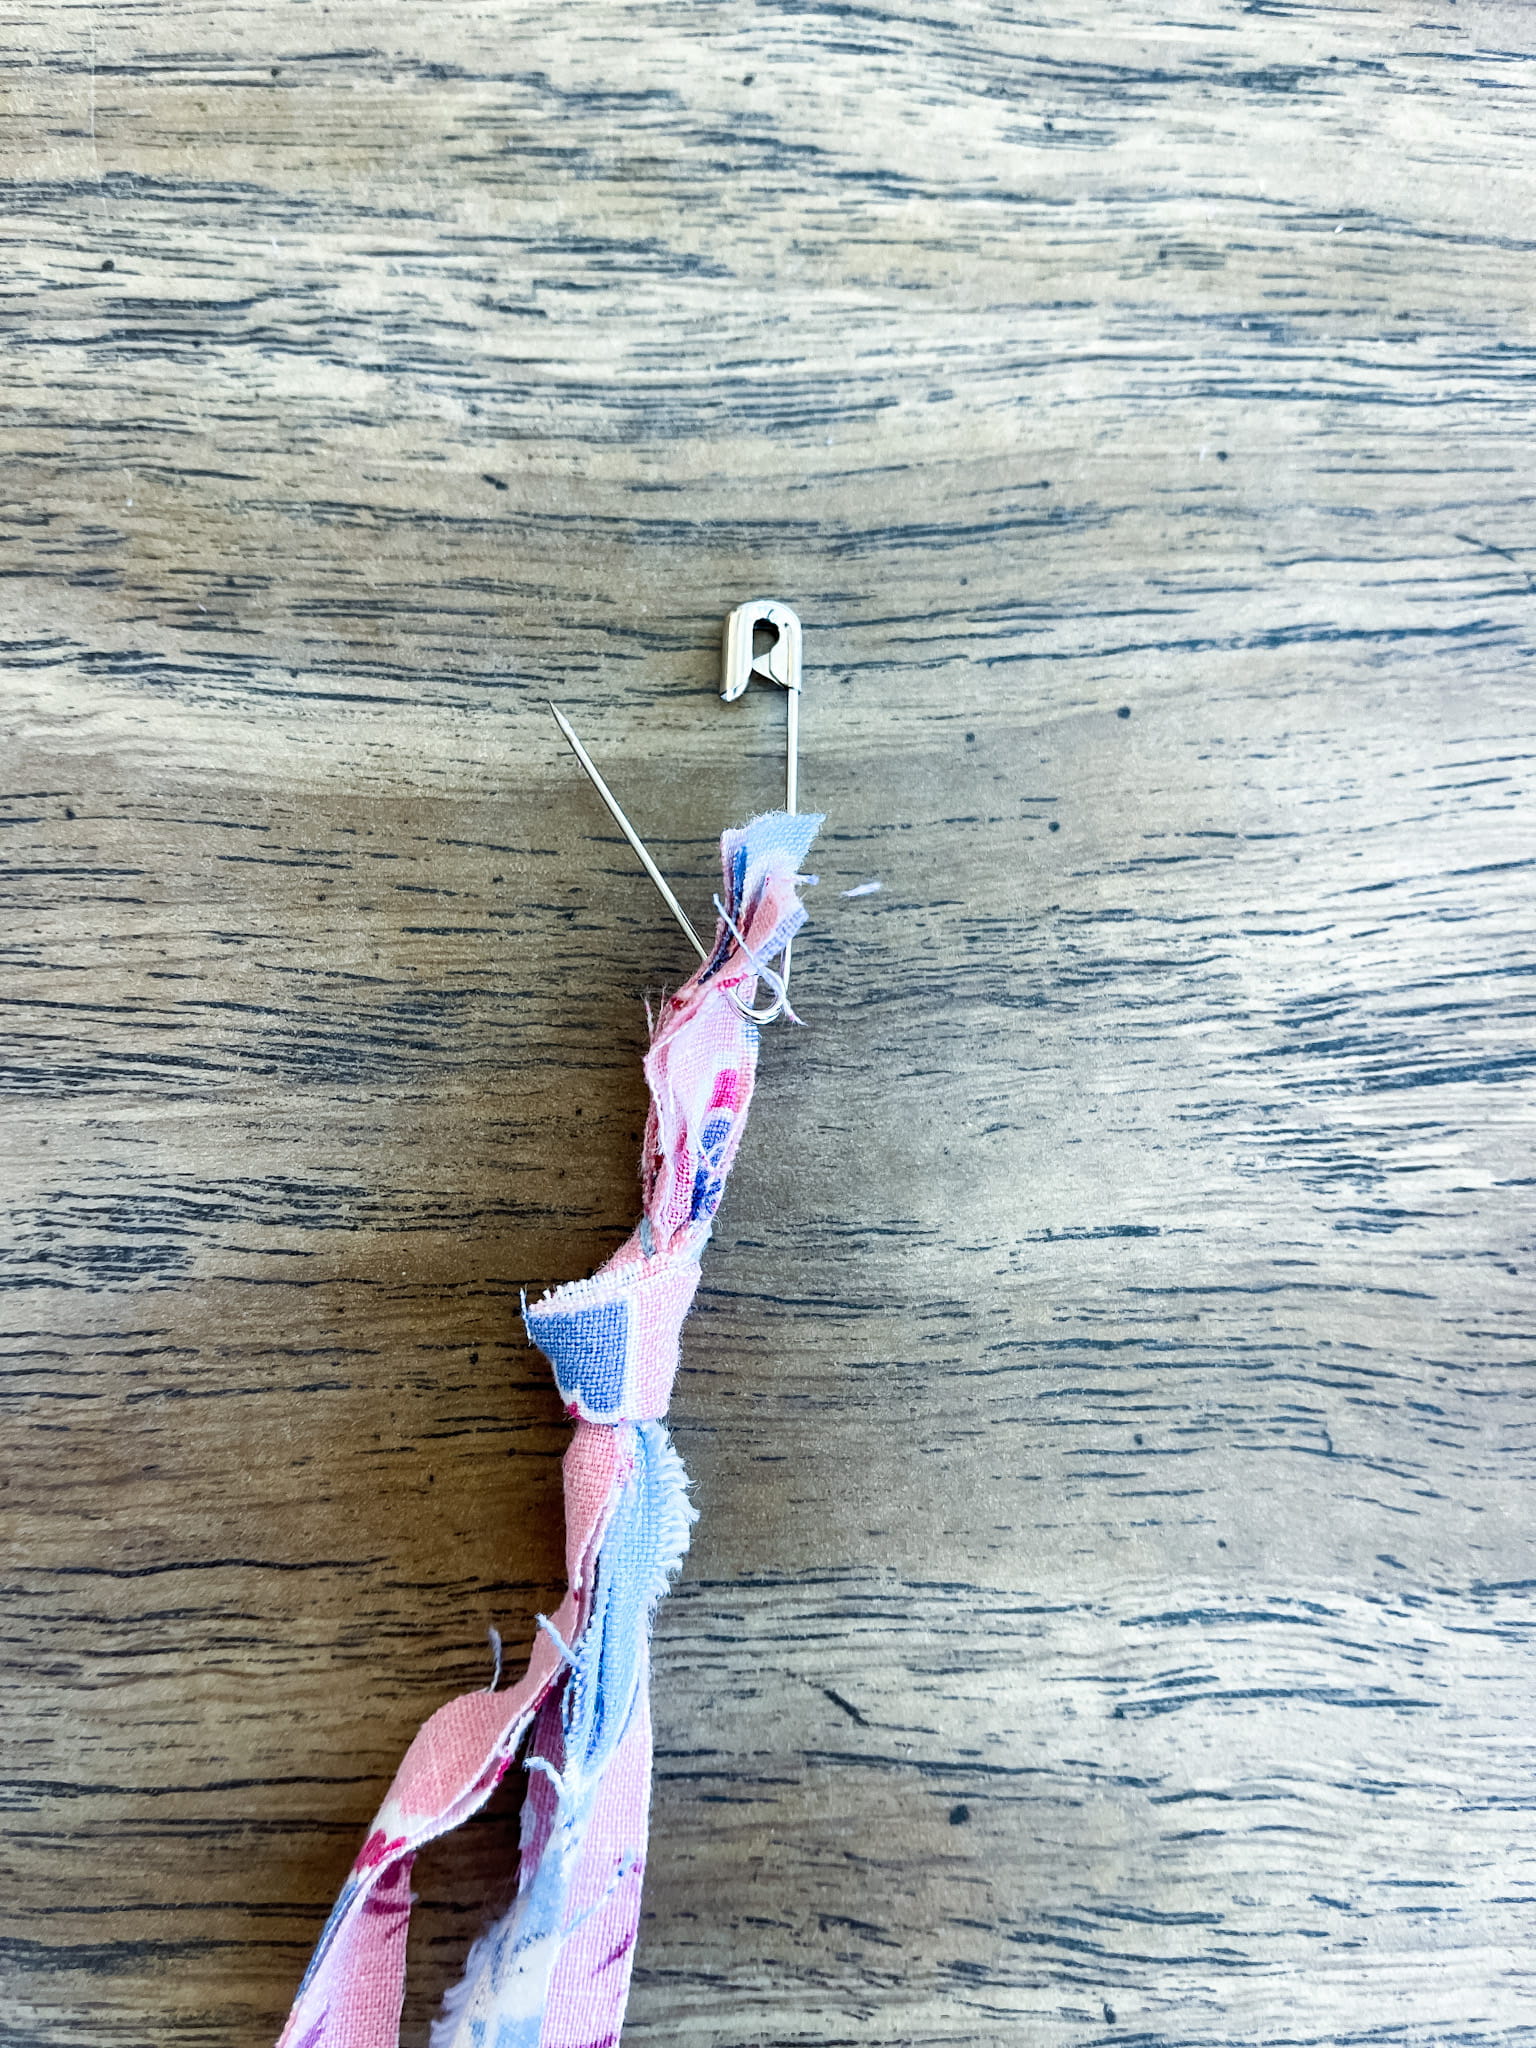
- Knot one of the strips around the ends of the other two. This will hold the strips together and give you somewhere to stick a safety pin.
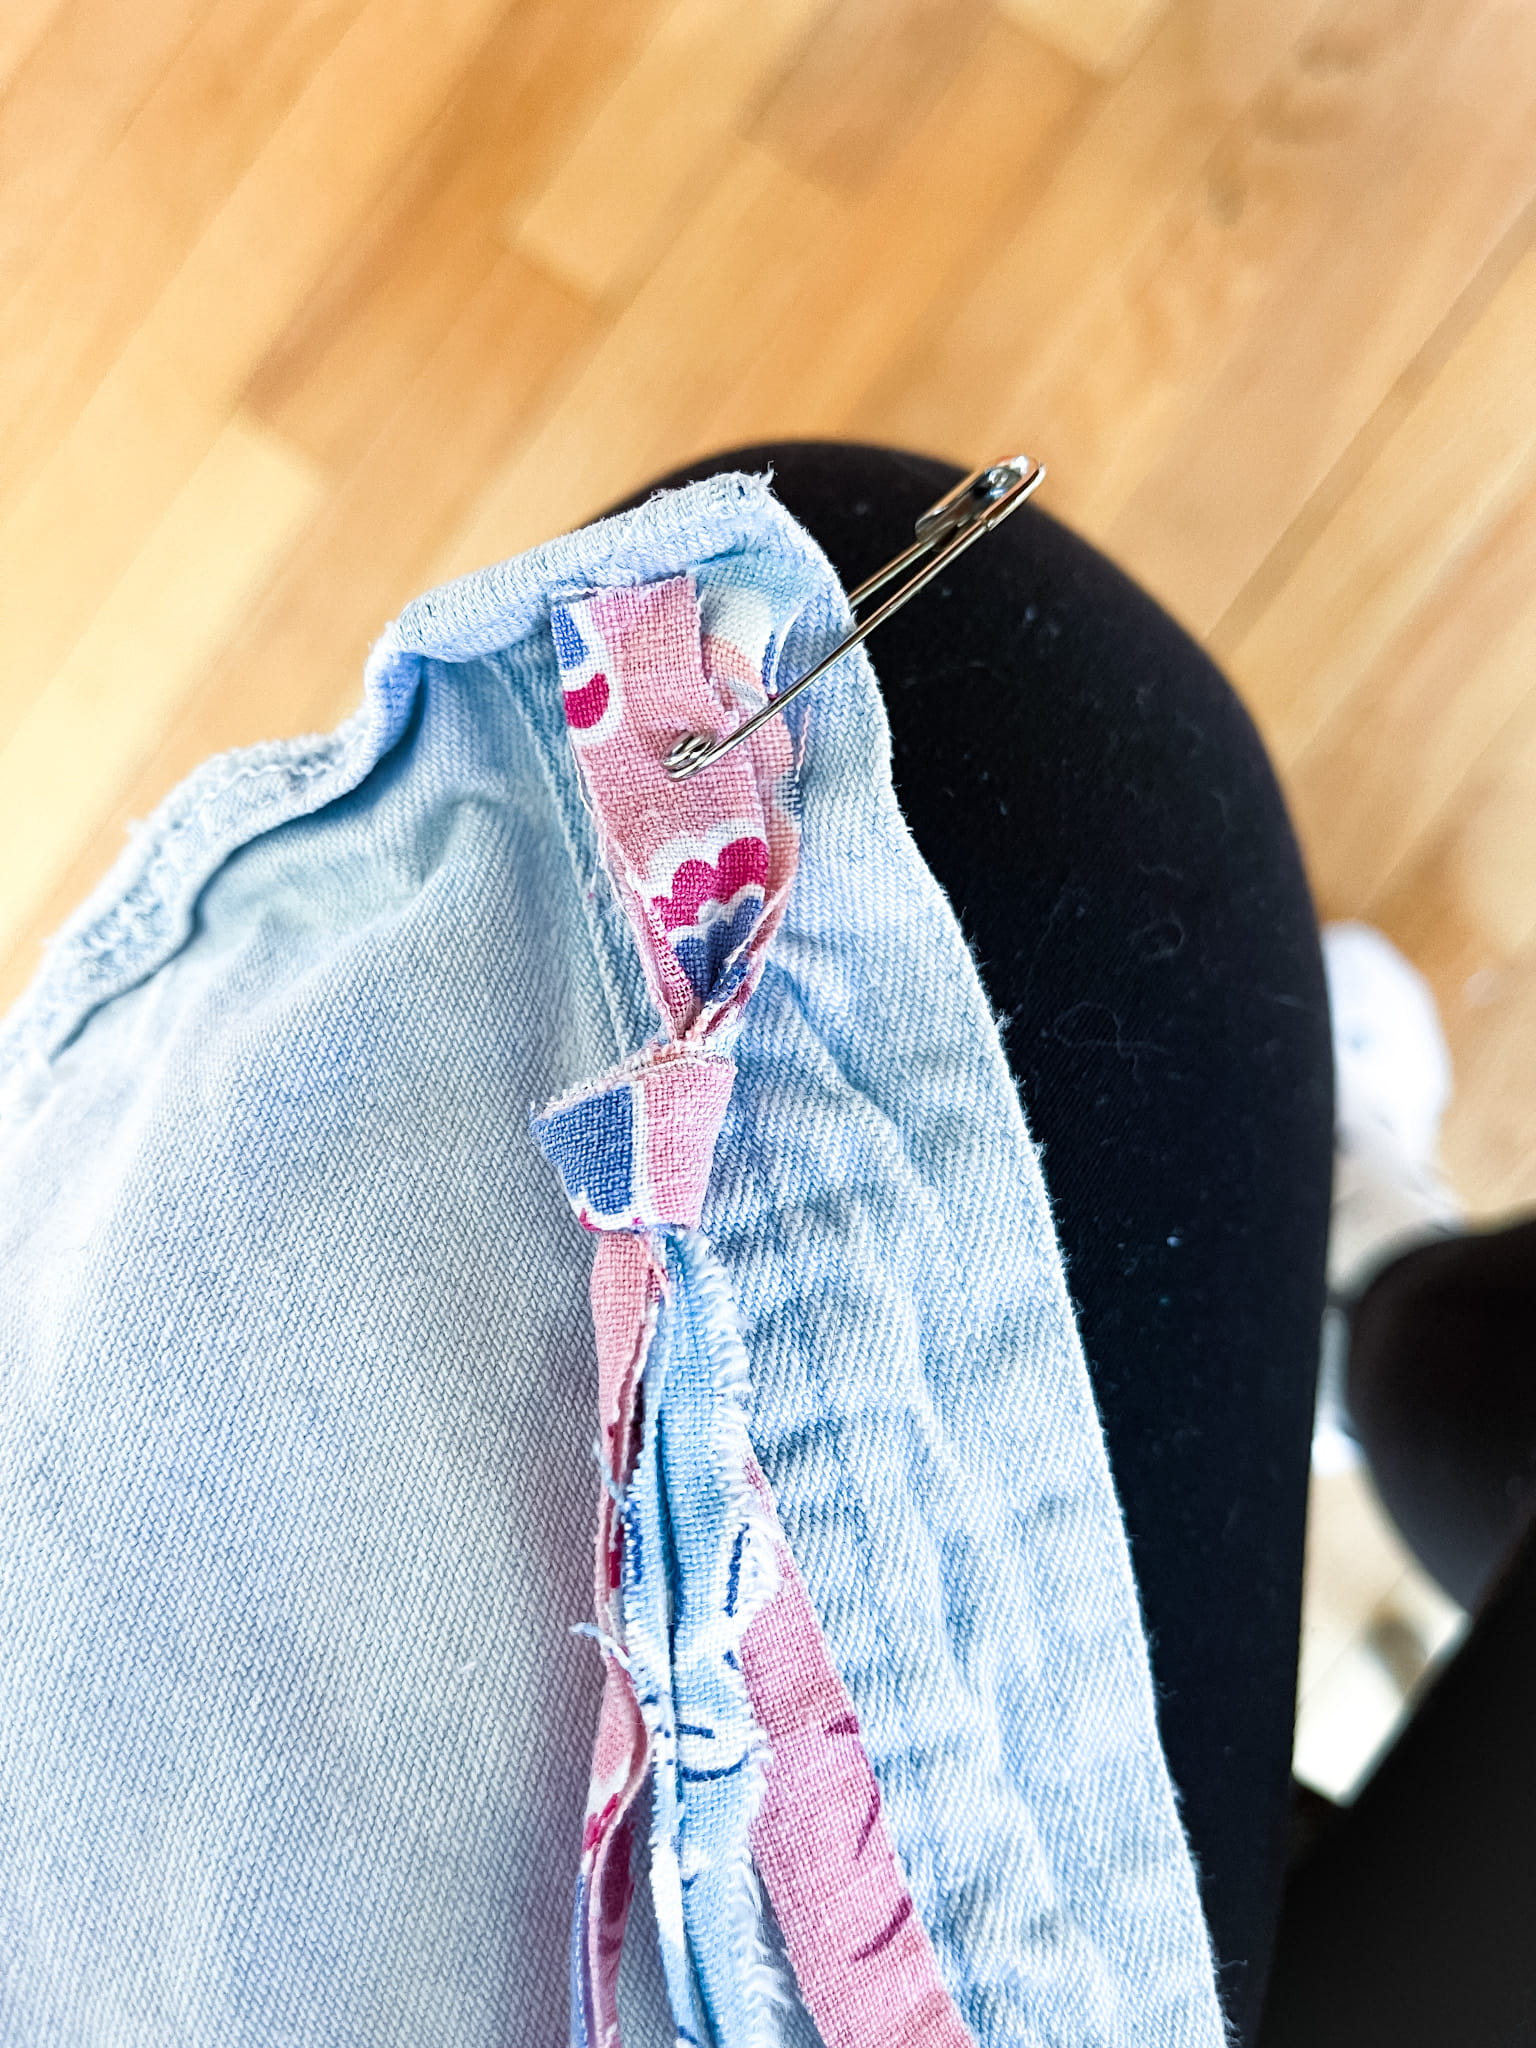
- Attach the safety pin to your pants, to hold the strips and allow you to use both your hands.
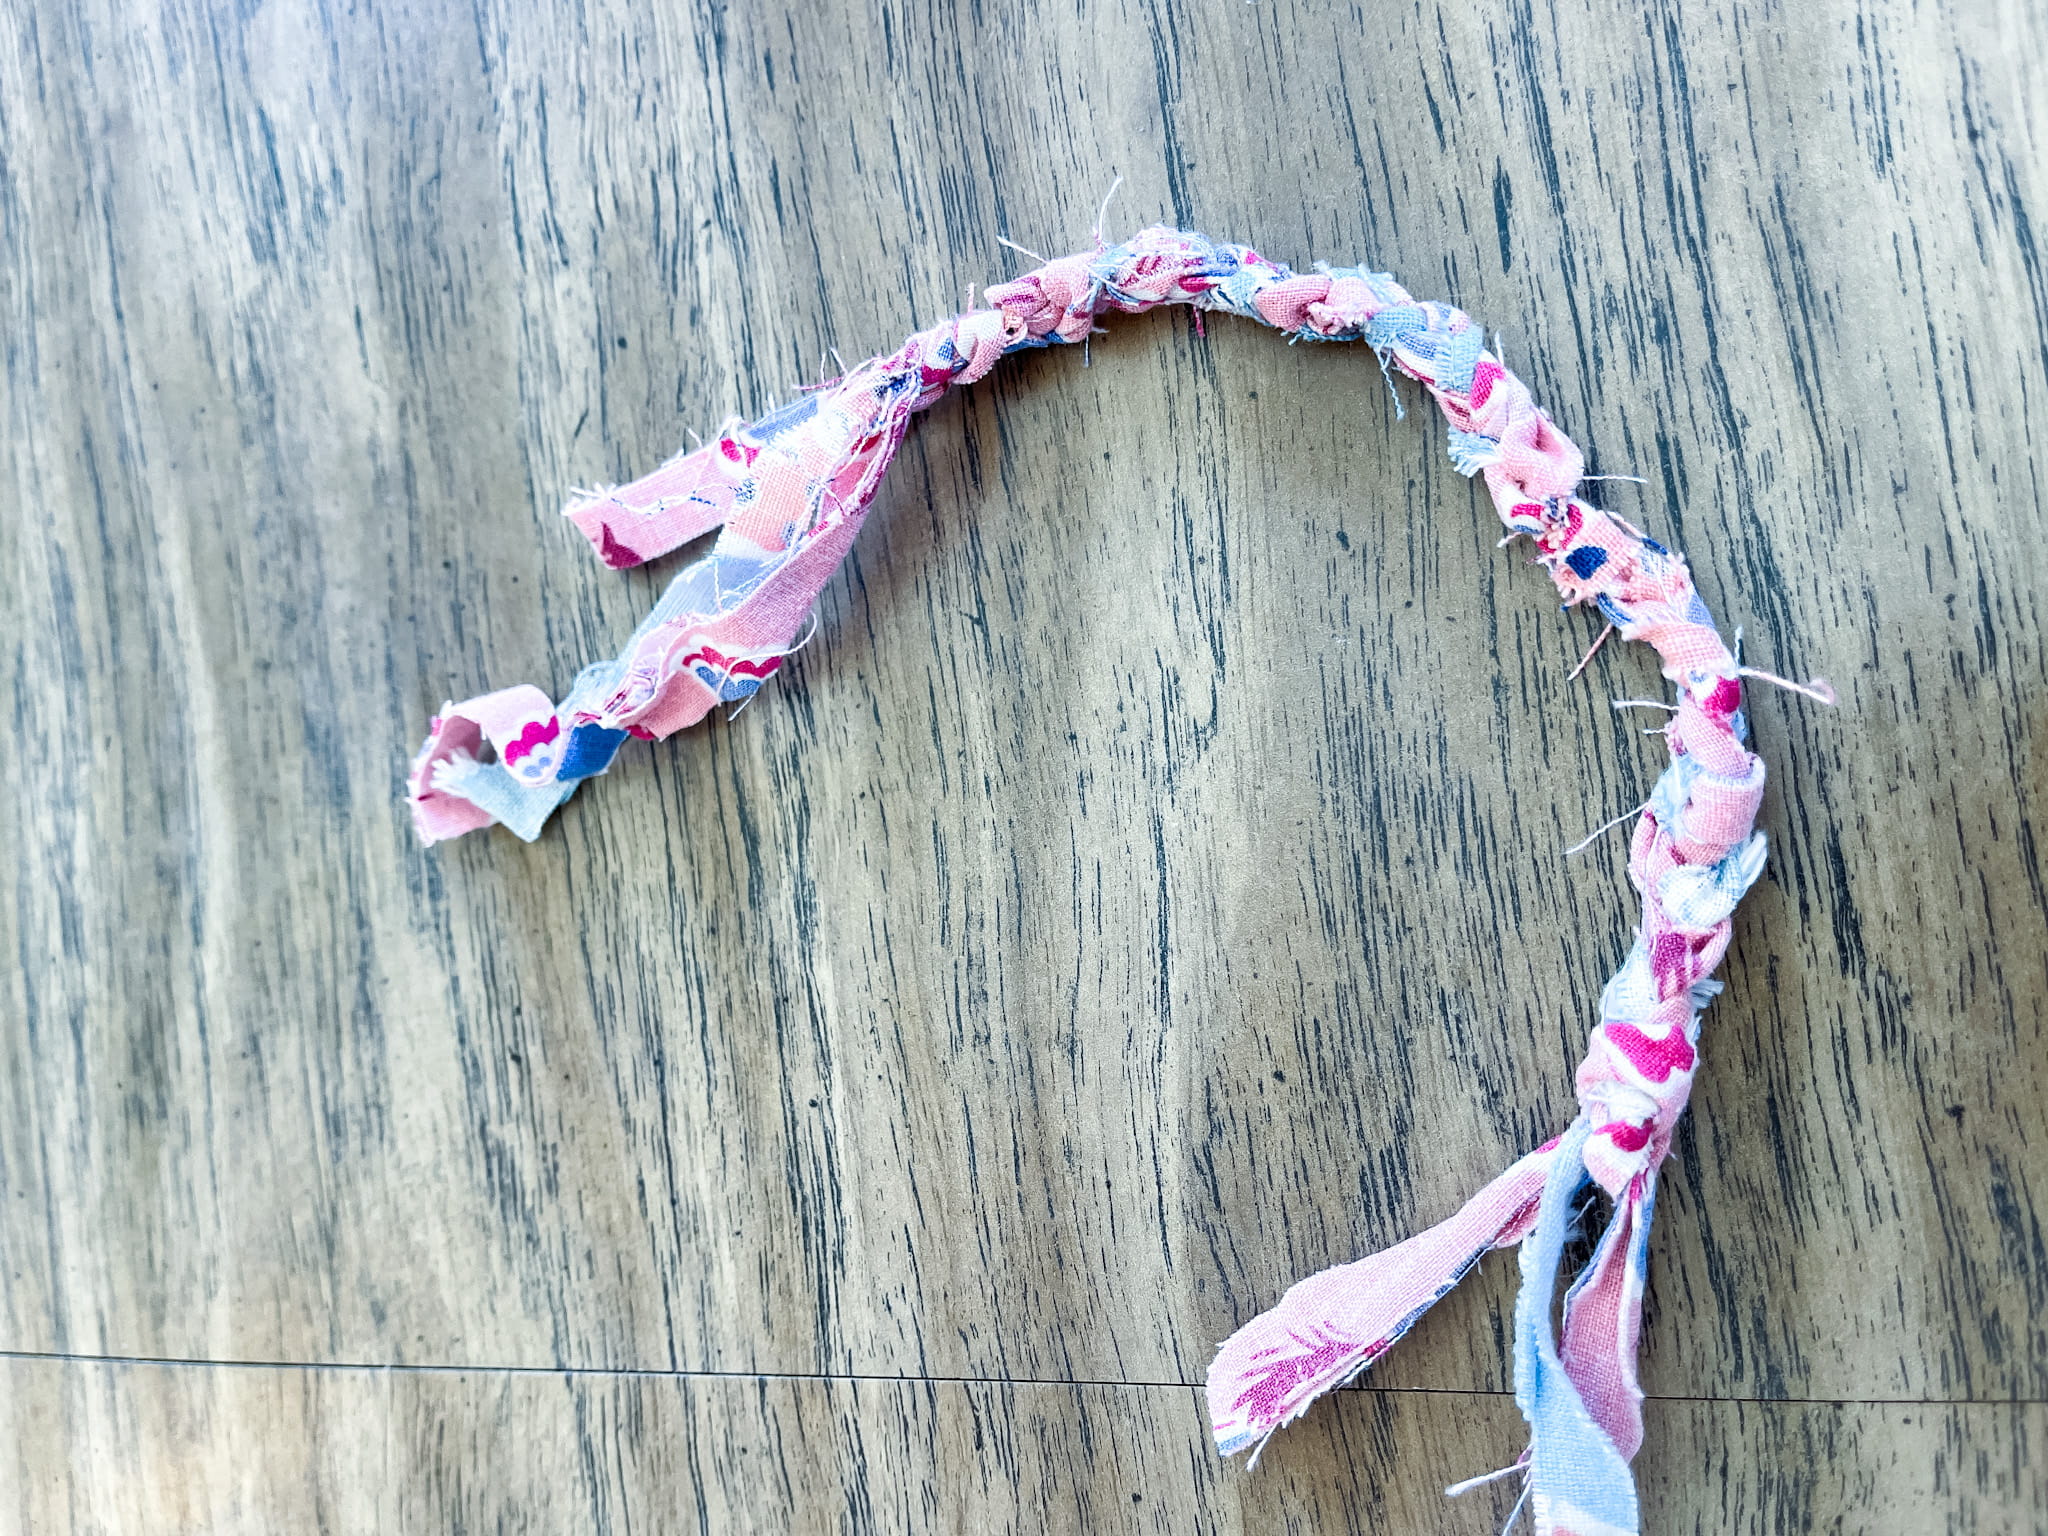
- Braid the strips of fabric, being careful to keep them pretty tight...so you don't have loose fabric.
- Roughly measure your wrist as you go to see how long you need the braid to be. You can always tie it off and undo some of the braid if it's too long. Also, remember to account for the extra length the closures will add.
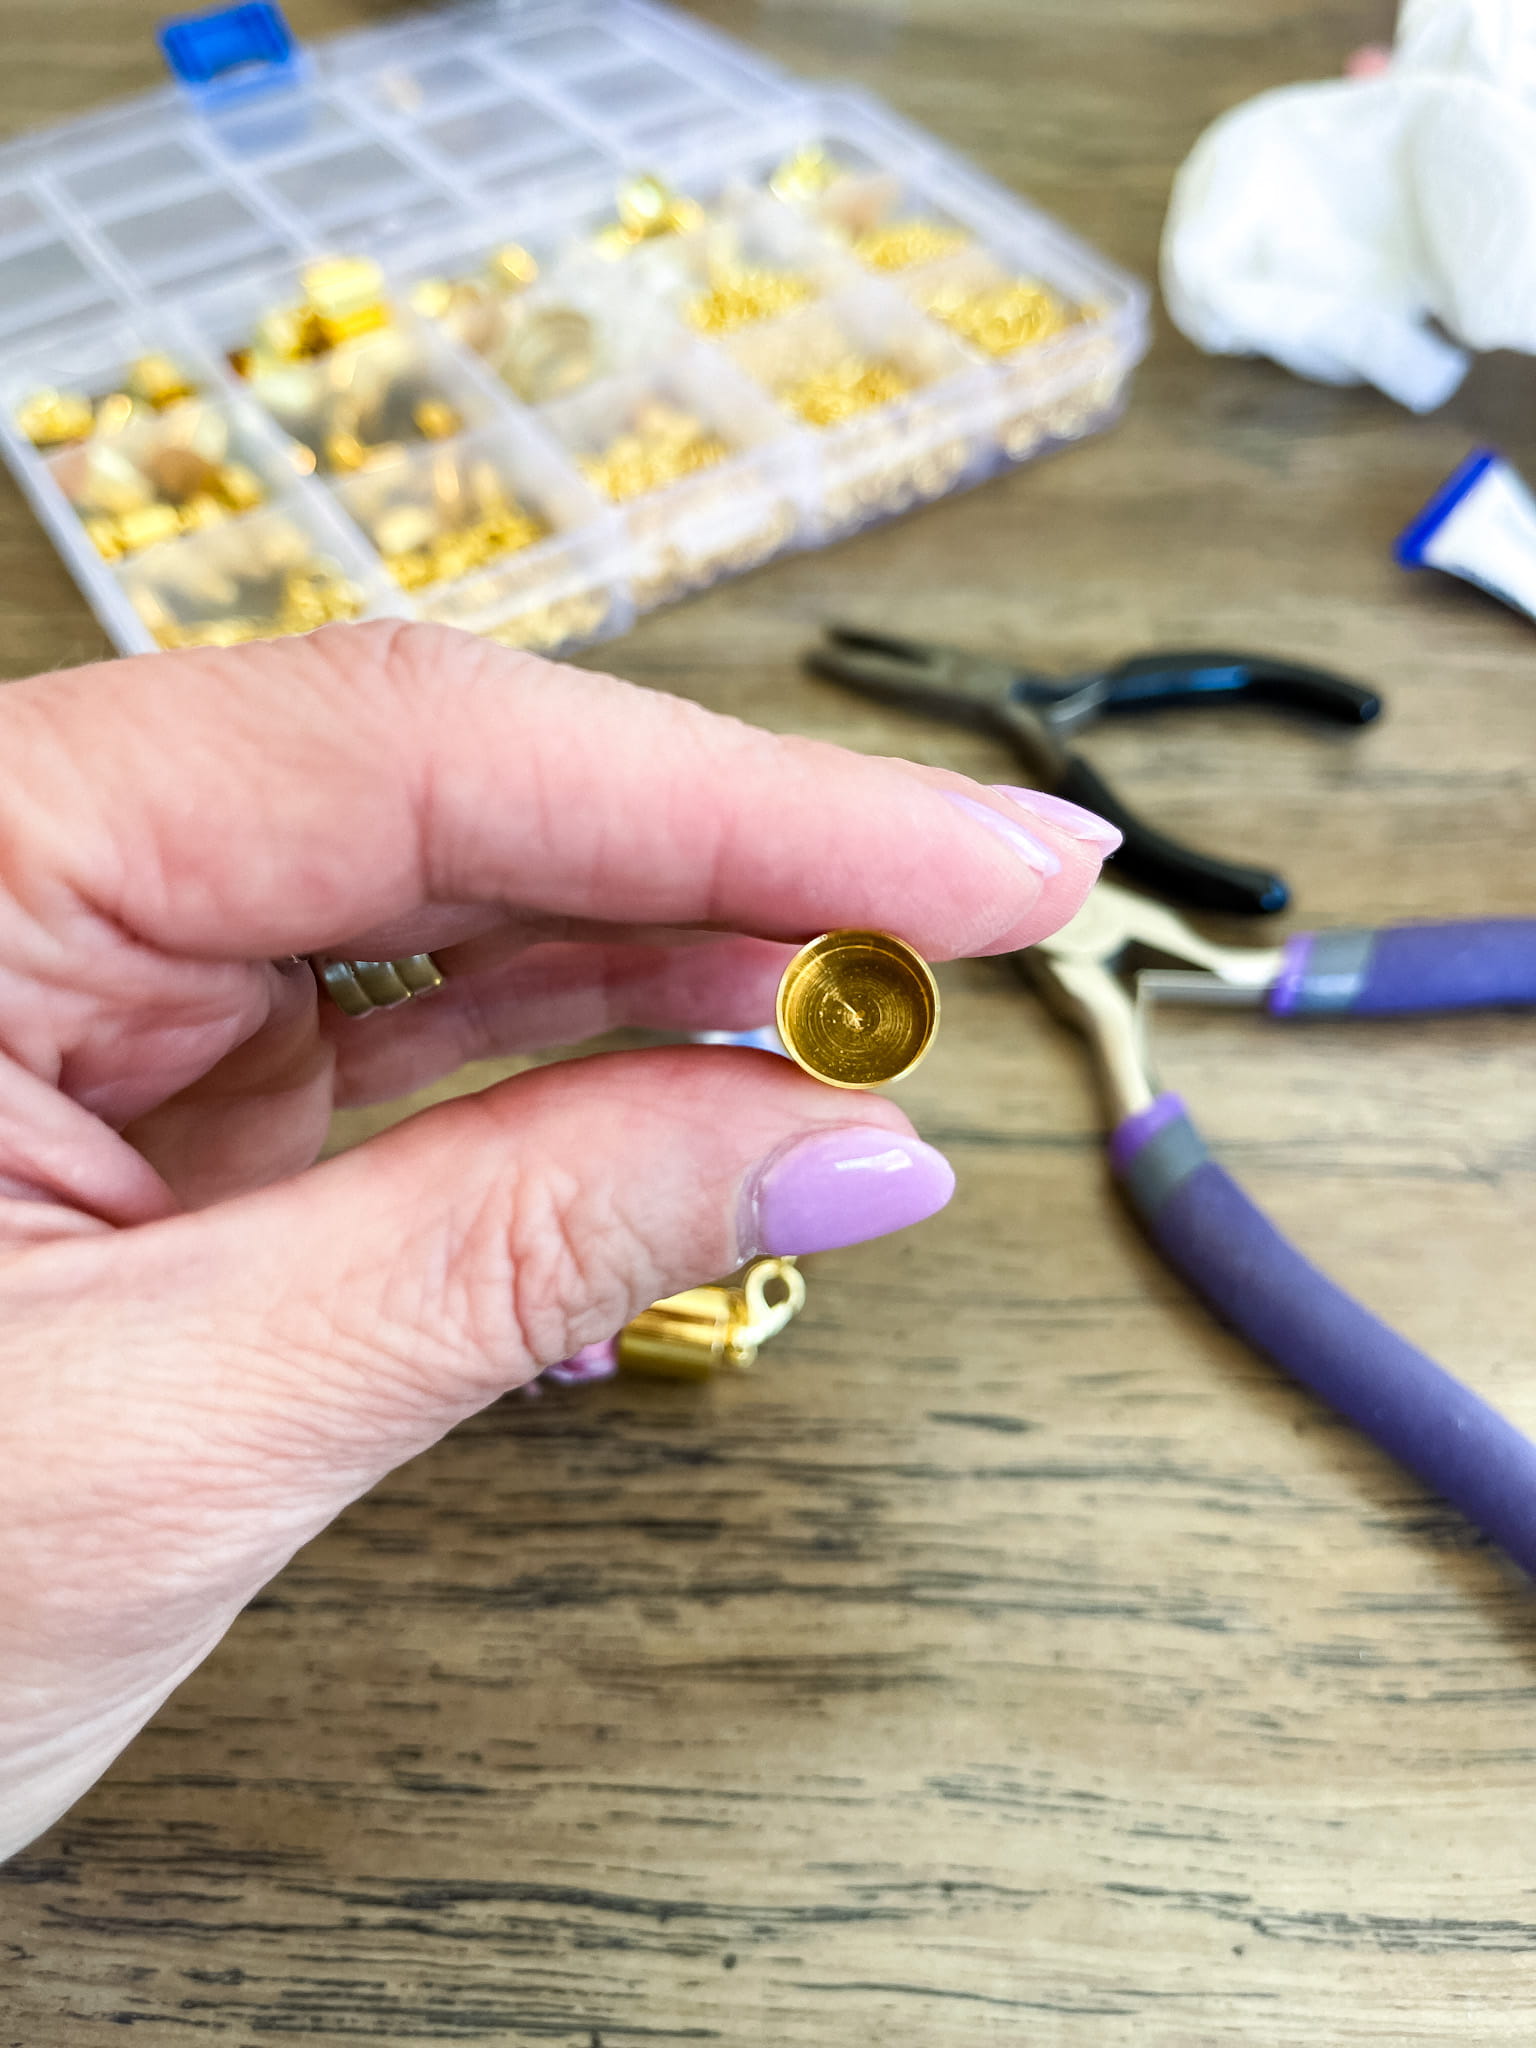
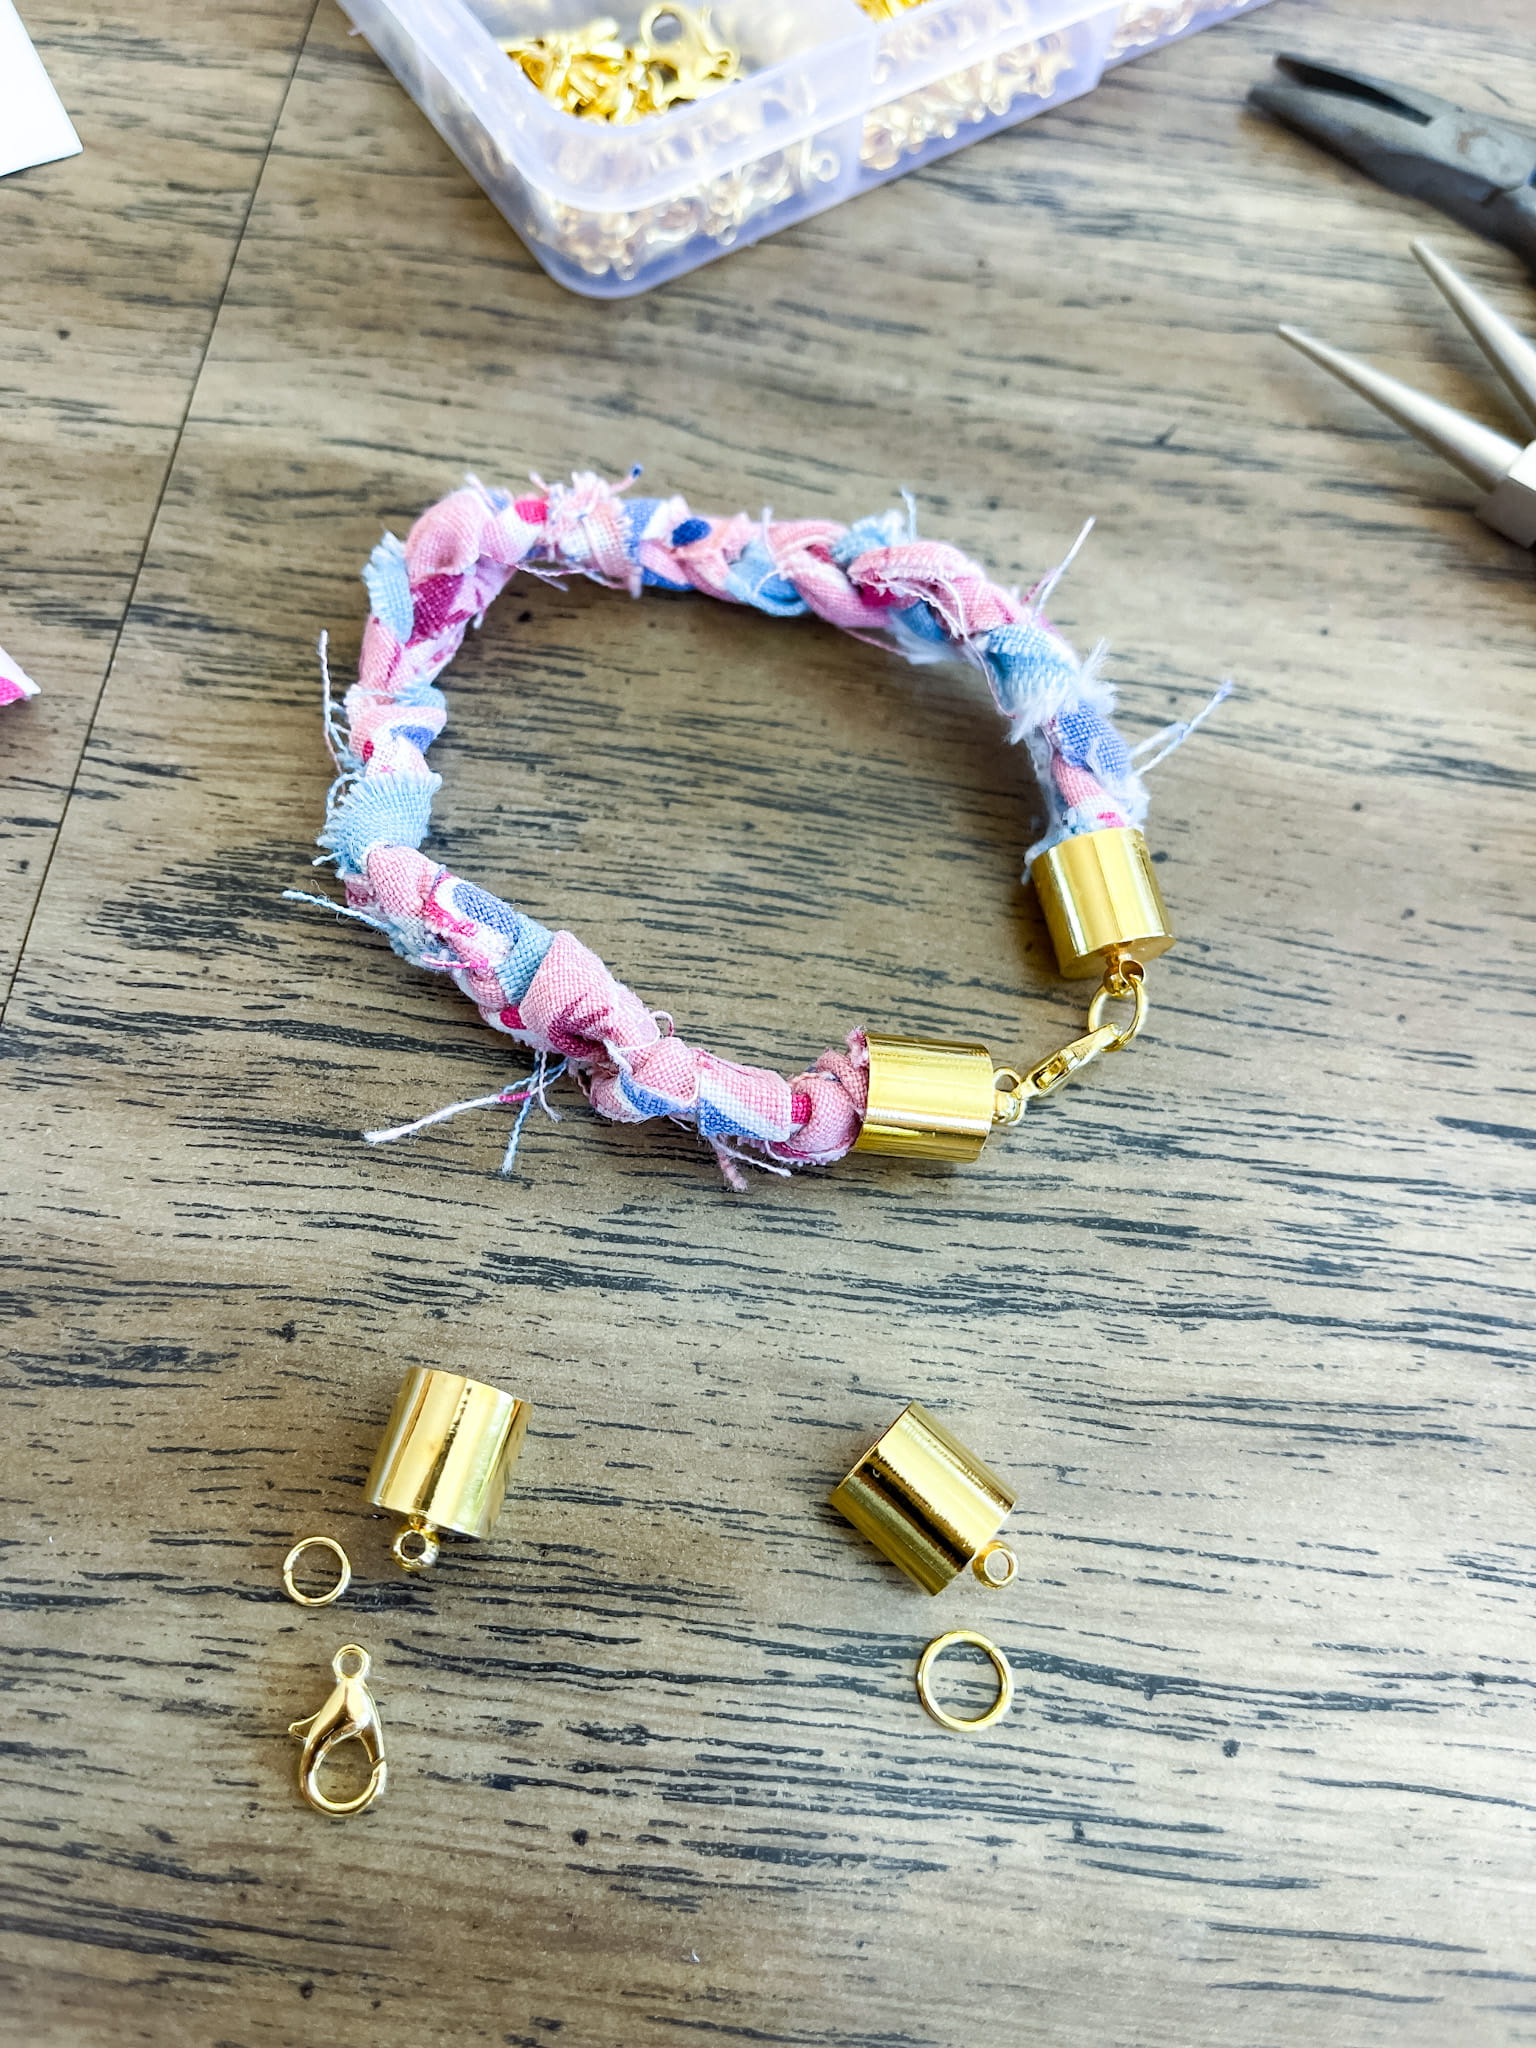
- To attach the cup closures to the bracelet, I picked the one that was the best size fit and then added a bit of super glue inside the closure for long-term hold. Then, I added HOT GLUE to the end of the bracelet to hold the closure on while the super glue dries. Don't add the hot glue to the inside of the closure...it makes it too hot to hold!
- One the cup closures are in place, you can add the jump ring to one end and jump ring and lobster claw to the other.
- You're all done!
None of this is particularly hard, but there is definitely a learning curve to putting the jewelry hardware on. Again...we're having fun and learning...give yourself grace! Also, don't want to put money into the hardware? Just tie it onto your wrist the old school way! I did find with the scarf material that there is some give and I'm able to slip them on and off without untying! Also, the bracelets don't really take much fabric to make at all. Honestly, this is something that can 100% be made from scraps. I even think that if you didn't have scraps that were long enough, you could tie them together. The bracelets wouldn't be as smooth, but it would add a bit of texture throughout!
.jpg)
Can I just tell you that I am so thrilled with this little project? I love being able to use a bit of my vintage fabric...and allowing myself to be creative! Bonus...I'm making something that no one else has! If you decide to try making them, I'd love to see! Share them to your INSTAGRAM and tag me so I can take a peek!
Products* to buy